Monday, June 1, 2009

Work History Part 5: RIT CS Dept. Teacher's Assistant

Location: Rochester, NY
Position: Teacher's Assistant and Student Lab Instructor
Period: September 2008 - May 2009

This job was my saving grace. The CS dept. had an excellent arrangement where they would pay for 100% tuition costs and give out a multi-thousand dollar stipend in exchange for about 20 hours of TA work per week.

I enjoyed teaching new students about object-oriented programming and the difference between references and pointers. Some of the student projects were interesting too, like solving the traffic jam puzzle and peg board game.

Responsibilities and accomplishments:
  • Taught computer science labs in Java and C++.
  • Graded student programming assignments.
  • Answered student questions in the mentoring center.
  • Held CS1-CS4 test review sessions.

Thursday, May 14, 2009

Object Tracking using Particle Filters

During my first year as a computer science grad I took a course in advanced computer vision. The class was divided into teams and each team could choose one of two projects to work on. The first project involved identifying students as they walked into a classroom based on their facial features. The second project involved tracking students as they walked into the classroom in-between other students. My team decided to work on the second project because my partner and I were both interested in motion tracking at the time.

We developed 3 systems with various degrees of motion-tracking success:
  1. Kalman filter. Actually the particle filter developed by Cuevas, Zaldivar, and Rojas which is based on the Extended Kalman Filter (EKF). Some success.
  2. Kalman filter with spring forces. Attempt to use multiple particle systems linked by spring forces to track multiple parts of a subject's body. Limited success.
  3. Hierarchical particle filter. Based on the work of Viola and Jones and the work of Yang, et al. Uses rectangular windows for feature extraction. Quite different from the Kalman filter and the 2 systems described above. Most successful.
A lot of time was spent adjusting the particle set properties used by the first 2 systems for each student test video. The third system is more robust and doesn't require as much custom-tailoring to the video to which it is applied.

The particle filter presented by Cuevas, Zaldivar, and Rojas attempts to track a small color distribution within a circular window centered around a target pixel.

Alternatively, the approach presented by Viola and Jones employs a rectangular target window to determine the relative position of average color intensities within an area of the video.

Viola and Jones had great success detecting faces using the target window to capture the average color intensity around a person’s eyes and the average color intensity of that person’s upper cheeks. It's a very simple concept but it works well in practice because of the intensity difference between those two regions of a person's face. In general a person's upper cheeks are much brighter than the inset region around their eyes.

Resources:

Sunday, May 10, 2009

Mobile Robots Programming: Retriever

During my third quarter as a computer science grad I took a course in mobile robot programming. Students were required to use the Player network server to control a Pioneer 2 DX (differential drive) robot with an 8-point sonar array and bumper array built into the front of the robot.

Using the Player interface, programs can be written on a laptop attached to the robot via an ethernet cable. In such a setup the laptop provides most of the processing power while communicating with the robot's sensors and actuators via an IP connection. Programs can be tested before controlling the hardware using the Stage simulator, which can simulate sensor readings and objects in a 2-D bitmapped environment.

Teams of students were asked to write control software capable of guiding the robot to a number of predetermined locations on the third floor of the GCCIS building, making sure to avoid other robots and innocent human bystanders on the way as well as successfully maneuvering along walls and through door frames when required. The idea was that there were items at each intermediary location that needed to be retrieved before traveling to a final destination.

To accomplish this the robot needed to perform 3 major tasks: localization, path planning, and path execution. The robot was guaranteed to start in one of 8 known poses (location and orientation), however, it did not know which of those locations it started in. We had the robot determine its starting pose by detecting known landmarks in the environment near its starting location, such as pillars and walls, and narrowing down the set of possible locations until it was left with the most probable one.

After localization the robot planned a path to the destinations specified in a user-provided input file. Path planning was aided by the fact that the environment was known a priori. The robot was provided with a black and white raw image file of the layout of the third floor of GCCIS that it converted to a rudimentary obstacle map. A probabilistic road map (PRM) approach was employed to plan a path from one location to another using the obstacle map.

Each path that was planned consisted of a series of waypoints. The entire path itself may have been complex, but the path between any 2 waypoints is nothing more than a straight line. The robot navigated the path between each pair of waypoints by using potential field motion. This addressed the issue of obstacle avoidance because the robot was repulsed by obstacles in its environment while being attracted to its current goal.

Resources:

Thursday, February 12, 2009

NeuroEvolution of Augmenting Topologies

During my second quarter as a computer science grad I took a course on neural networks. As mentioned in a previous post, I had previously taken a course in pattern recognition. Since I already knew quite a bit about neural nets I decided to research the topic of NeuroEvolution of Augmenting Topologies (NEAT) instead of work on the scheduled class project (comparing the performance of feed-forward, recurrent, and radial basis function neural nets).

NEAT is a genetic algorithm for evolving artificial neural networks that protects innovation by dividing network types into species based on similar characteristics. During crossover new networks inherit nodes and node connections from their parent networks to form a new network structure. Node genes and connection genes are labeled with innovation numbers so that as those genes can be tracked as they are passed on to future generations. After crossover new networks undergo mutation where new nodes or new connections are added to the network and connections weights are adjusted by a random process.

Unlike traditional learning where connection weights are adjusted via a backpropagation technique, NEAT selects members from the spawned population, called genomes, for breeding. The evolved members are composed of nodes with sigmoidal activation functions that behave in the same way as traditional multi-layer perceptron networks.

Using jNEAT, a Java implementation of NEAT, I attempted to solve 2 different classification problems. The first problem was to classify 150 iris samples as 1 of 3 breeds based on 4 features. The second problem was to classify 178 wine samples as originating from 1 of 3 batches of wine based on 13 features. After conducting a number of different experiments using various configurations settings, I was able to generate a network with 96% correct classification for the iris test dataset and a network with 85% correct classification for the wine test dataset.

About a year later I went on to apply the concept of speciation to a genetic algorithm in my masters thesis.

Resources:

Wednesday, October 29, 2008

Handwritten Digit Recognizer

During my first quarter as a computer science grad I took an incredibly enlightening course in pattern recognition. Teams of students were assigned the task of implementing a handwritten digit recognizer. Like humans, computers need to determine the content of handwritten information before it can be used in a meaningful way. This is accomplished through a form of optical character recognition (OCR).

The postal service accepts packages and envelopes with handwritten addresses which must be read and interpreted in order to sort mail and send each item to its intended destination. It's both impractical and expensive to have humans sort large volumes of mail so automated computer systems are often used instead. The systems often consist of cameras which take pictures of the addresses and feed the images into program for processing.

My team decided to implement a convolutional neural network similar to Lecun's LeNet-5.
  • The first layer is the input layer and consists of one neuron per pixel in a 29x29 padded version of the sample image.
  • The second layer applies 6 feature maps to the input layer. Each feature map is a randomly distributed 5x5 convolutional kernel.
  • The third layer applies 50 feature maps to all 6 of the previous feature maps after sub-sampling. Again, each feature map is a randomly distributed 5x5 convolutional kernel. These 2 layers are referred to as a trainable feature extractor.
  • The fourth and fifth layers are referred to as a trainable feature classifier. These 2 layers are fully connected and compose a universal classifier.
A convolutional neural network exploits the spatial structure of digits and attempts to train weights to identify spatial differences between digits. We calculated classification error rates using standard backpropagation, which played a major role in training the system.

After running the network with 100 hidden nodes for 5 epochs over 60000 MNIST training samples and 10000 test samples, our network misclassified 851 samples and had a 91.4% success rate. Not bad.

While this project focused on recognizing handwritten digits, the concepts and algorithms covered can be easily extended to apply to all alphanumeric characters.

Resources:

Monday, September 1, 2008

Work History Part 4: Xerox Corporation

Employer: Xerox Corporation
Location: Webster, NY
Position: Software / Firmware Engineer
Period: June 2008 - August 2008

Xerox is a global document management company specializing in the production of workstation printers, large scale printing presses, multifunction systems, and the supplies required to run such devices.

Nowadays Xerox seems to be shifting its focus to collaborative web technologies to make it easy to share, edit, and print digital media.

Xerox is named after the process of xerography, which was invented by Chester Carlson in 1938. The Center for Imaging Science (CIS) at RIT is named in honor of Mr. Carlson. A little over a year after I worked for Xerox I was hired to perform research on a flat plate xerographic printing press for the Print Research and Image Systems Modeling Laboratory in CIS.

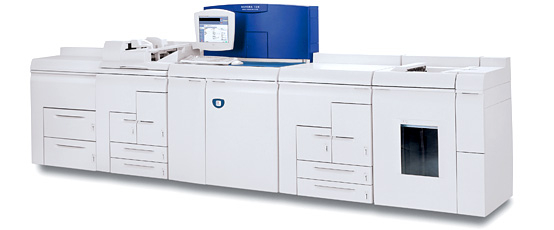
While working for Xerox I was part of the Platform Development Unit / Control Systems Platform group and was part of the Xerographics / Image Path Software team. I helped maintain and develop the Nuvera Digital Production System line of products; however, my primary task was to implement C++ code to control a down-shooting printhead fixture.

The down-shooting fixture was a digital coater device capable of printing clear gel ink on paper. Such a device allows users to coat specific areas of a document with gloss instead of performing a flood coat of the entire page. Also, such a device can print Braille on pharmaceutical bottles. The European Union has made it mandatory that the name of all medications be printed on the packaging in Braille.

Responsibilities and accomplishments:
  • Migrated digital coater LabVIEW code to production-worthy C++ application code.
  • Designed a software architecture for Controller Area Network communication.
  • Analyzed and implemented solutions for problems with the Nuvera Digital Production System printer.

Thursday, May 15, 2008

Computer Graphics II Projects

During my last year as a software engineering undergrad I took a graduate-level course in advanced computer graphics using OpenGL. Each student was required to implement a ray tracer from scratch in order to render a scene similar to Turner Whitted's classic example of transmissive and reflective spheres. A record of my progress is posted on the LiveJournal (tag: raytracer) I kept for the class. The image to the right was the final product.

My personal research project during the class was to implement a particle system from scratch to animate realistic looking fire. I applied a texture map to each particle to give it shape and definition detail. Also, the texture map was necessary to provide the alpha channel used for alpha blending. Various system parameters can be modified in real time to give the particle system the appearance of a lava lamp or even multi-colored fireworks.


The project details are posted on my LiveJournal (tag: openfire). I named the project OpenFire because the source code is available free of charge to the open source community. If modified, all I ask is that I be credited in the source code comments.

Resources:

I also dabbled in a little bit of Pixar's Renderman technology. There was a student competition to see who could create the most interesting image. I won second place for my abstract rendition of a woman's head and brain! Check it out on my LiveJournal (tag: renderman).